The best gluten free chocolate cupcakes recipe in all the land is finally here, and it's absolutely delicious. These rich and decadent, yet light and fluffy cupcakes are topped off with a creamy chocolate buttercream and are a wonderful gluten free, healthy, and easy dessert.

The best gluten free chocolate cupcakes
It’s been a crazy week thus far. Today is Valentine’s Day, and my husband and I just so happen not to celebrate.
Instead, I decided to post a really sappy love note to him on Facebook, for all of the interwebs to see. I love embarrassing him with corny, emotional word vomit. Today’s the day that I have at it each year. We don’t do fancy dinners or gifts on this day, so this will absolutely have to do.
I’ll probably end up sharing what I wrote further down in this post… yeah, I most definitely will.

Ingredients and substitutions
For the cupcakes, you will need:
- Raw cashews
- Arrowroot flour
- Kosher salt
- Baking powder
- Cacao powder
- Maple syrup
- Eggs
- Coconut oil
- Vanilla
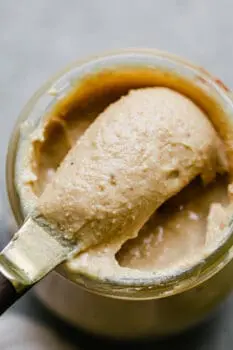
Creamy chocolate buttercream frosting
You won’t miss “real” buttercream after getting a lick or ten of this stuff, trust me.
I love that it comes together with just a handful of simple ingredients.
It's rich, decadent, and you will have leftovers to use for whatever you'd like: dipping fruit into or simply eating off of a spoon! 😉
It tastes so delicious… it’s creamy, fluffy and perfectly sweet! It really pairs well with the rich cacao powder used in the cupcakes.
I highly recommend using cacao if you can get your hands on it. Unsweetened cocoa powder will work well, too but the flavor profile and richness you get from cacao is very hard to beat…!

How to make gluten free chocolate cupcakes
Preheat the oven to 350 degrees Fahrenheit. Line a cupcake pan with 12 parchment baking cups. Adjust the oven rack to the middle position.
Pulse the raw cashews in a food processor or high-speed blender, a few seconds at a time, until they resemble a coarse flour. You don’t want any visible chunks of cashews. This should take about 1 minute. Be sure not to turn the cashew flour into cashew butter. Watch the texture closely.
Add the rest of the dry ingredients into the processor and pulse until well combined. In a medium bowl, mix all of the wet ingredients together. Add the dry ingredients into the wet. Stir just until combined and be careful not to over-mix (I just used a fork and spent a few minutes carefully mixing until no streaks remained.)
Divide the batter evenly among the 12 parchment-lined cups. This should leave you with each about ¾ full. Bake for 16-20 minutes, until a toothpick inserted in the middle of a cupcake comes out clean. Set aside and transfer to a wire rack to cool off & begin preparing the chocolate buttercream.

Gently heat up the chocolate: in a microwave on medium power (about 60-120 seconds, stopping and stirring every 30 seconds) or on the stove top using a double boiler method on medium-low until melted. Set aside to slightly cool.
Scoop the coconut cream out of the can(s) of coconut milk into a medium mixing bowl. If you are using heavy cream, place it directly into the mixing bowl. Beat with an electric mixer on high speed until stiff peaks form (usually 2-3 minutes.) Cover and refrigerate the cream.
In the bowl of a stand mixer, beat the softened butter on medium speed for 1 minute.
Add in the coconut sugar and continue beating until light and fluffy, about 3-5 minutes. Be sure to scrape down the sides every minute or so. Pour in the cooled chocolate to the mixture and beat until well incorporated.
Add 2 out of 3 of the eggs and beat on medium speed for about 3 minutes. Add in the last egg and beat for another 3 minutes until the mixture is smooth.
Fold the chilled coconut/heavy cream into the chocolate filling until no there are no visible white streaks left, and stir in the vanilla extract. Pipe cupcakes with buttercream or spread on top using an offset spatula.

How can these gluten free chocolate cupcakes be stored?
If you are also making a frosting recipe and doing this all ahead of time, I'd recommend storing them separate from one another in an airtight container.
You can store the cupcakes at room temperature for up to 2 days. Then, I would put them into the refrigerator.
They will last in the refrigerator for up to 4 days but taste best fresh in my opinion. 🙂
Other frosting ideas:
Vegan Chocolate Buttercream Frosting
Paleo Chocolate Buttercream Frosting
Vanilla "Buttercream" Frosting

More gluten free chocolate desserts you'll love:
Dairy Free Keto Chocolate Cake
Paleo Double Chocolate Zucchini Bread
Best Paleo Chocolate Chip Cookies

Best Gluten Free Chocolate Cupcakes
Ingredients
Chocolate Cupcakes
- 80 grams raw cashews approximately ⅔ cup
- 5 tablespoons arrowroot flour
- 1 teaspoon baking powder
- ¼ teaspoon kosher salt
- ½ cup plus 2 tablespoons cacao powder or unsweetened cocoa powder
- 1 teaspoon pure vanilla extract
- ½ teaspoon hazelnut extract see notes
- ½ cup coconut oil melted and at room temperature
- ½ cup pure maple syrup
- 3 large eggs
Chocolate Buttercream
- 4 ounces dark chocolate see notes
- ¾ cup coconut cream or heavy cream see notes
- 6 ounces grass-fed butter softened, see notes
- 1 cup coconut sugar see notes
- 3 large eggs
- 1 teaspoon pure vanilla extract
Instructions
- Preheat the oven to 350 degrees Fahrenheit. Line a cupcake pan with 12 parchment baking cups. Adjust the oven rack to the middle position.
- Pulse the raw cashews in a food processor or high-speed blender, a few seconds at a time, until they resemble a coarse flour. You don’t want any visible chunks of cashews. This should take about 1 minute. Be sure not to turn the cashew flour into cashew butter. Watch the texture closely.
- Add the rest of the dry ingredients into the processor and pulse until well combined. In a medium bowl, mix all of the wet ingredients together. Add the dry ingredients into the wet. Stir just until combined and be careful not to over-mix (I just used a fork and spent a few minutes carefully mixing until no streaks remained.)
- Divide the batter evenly among the 12 parchment-lined cups. This should leave you with each about ¾ full. Bake for 16-20 minutes, until a toothpick inserted in the middle of a cupcake comes out clean. Set aside and transfer to a wire rack to cool off & begin preparing the chocolate buttercream.
- Gently heat up the chocolate: in a microwave on medium power (about 60-120 seconds, stopping and stirring every 30 seconds) or on the stove top using a double boiler method on medium-low until melted. Set aside to slightly cool.
- Scoop the coconut cream out of the can(s) of coconut milk into a medium mixing bowl. If you are using heavy cream, place it directly into the mixing bowl. Beat with an electric mixer on high speed until stiff peaks form (usually 2-3 minutes.) Cover and refrigerate the cream.
- In the bowl of a stand mixer, beat the softened butter on medium speed for 1 minute.
- Add in the coconut sugar and continue beating until light and fluffy, about 3-5 minutes. Be sure to scrape down the sides every minute or so. Pour in the cooled chocolate to the mixture and beat until well incorporated.
- Add 2 out of 3 of the eggs and beat on medium speed for about 3 minutes. Add in the last egg and beat for another 3 minutes until the mixture is smooth.
- Fold the chilled coconut/heavy cream into the chocolate filling until no there are no visible white streaks left, and stir in the vanilla extract. Pipe cupcakes with buttercream or spread on top using an offset spatula.
Notes
- Cacao powder: I highly recommend using cacao if you can get your hands on it. Unsweetened cocoa powder will work well, too but the flavor profile and richness you get from cacao is very hard to beat.
- Hazelnut extract: If you are omitting the hazelnut extract, you can use an extra ½ teaspoon of vanilla extract. You can also use almond extract.
- Dark chocolate: Use a good quality 70-80% dark chocolate and be sure to weigh it out to 4 ounces!
- Heavy cream: Feel free to use either heavy whipping cream or chilled coconut cream.
- Coconut sugar: The coconut sugar cannot be substituted for regular, granulated sugar.
- Butter: Get your butter soft by letting it sit at room temperature for about 1-1.5 hours (depending on the temperature of your house.)


Bess says
Hi - I’m so excited about these, but I don’t have count sugar. Could I use monk fruit sweetener in the frosting instead?
Hi!!!!! Go for it. However, I'd grind it down first and turn it into a powder and use a bit less. Start with 2/3 cup and see how that tastes?
Jessica says
Hi there! Trying to make for daycare tomorrow but since no maple sugar could I use coconut sugar instead? Thank you for the recipes!
Hi there! Such a great question. You absolutely can, but it's subtle so you may need more and to adjust the shortening / milk amount. Just taste it until it reaches your desired sweetness level! 🙂
Stefanija says
Hi
Loving this and very exited to try it, but just wondering will this recipe works with tapioca flour instead of the arrowroot??
Thank you in advance,
Stefanija
Hi there! Generally, you can substitute the two without too much of a problem. Can you let me know how they turnout?