
This recipe for gluten free and dairy free brownies is quick and easy to make, incredibly decadent, and amounts to the most perfect texture. The brownies are dense, fudgy, made with dark chocolate, and topped off with flaked salt.

Super dense and fudgy paleo brownies
These brownies are extremely decadent, dense, and fudge-like. They are going to be extremely satisfying, and you'll probably feel really happy after just eating one.
Don't let that stop you from taking a second though... or a third! 😉
If you are looking for a more cake-like brownie recipe, I'd recommend:
The Ultimate Paleo Cakey Brownies
Luckily, you don't need a long list of ingredients to make these magical things. If you aren't dairy free, feel free to use melted ghee or butter instead of coconut oil.
Otherwise, all you will need is outlined below.

What makes these gluten free brownies so delicious?
I think it's truly a combination of things. However, as soon as I discovered I was impartial to fudgy brownies over cakey brownies, I knew there were a few things that would make this recipe stand out.
- They don't dry out after sitting out all day, and they'll keep for up to 5 days in the refrigerator.
- The texture is insane. The density and fudge factor are out of this world!
- Topping them off with a bit of flaked salt really makes the flavors soar.
- The brownies are completely free of gluten, dairy, refined sugar, and flour.

The main difference between a cakey brownie and a fudgy brownie is the amount of flour used and/or leavening agents (baking soda, baking powder, etc.)
The leaving agents will give them the rise factor you're looking for when making a cake recipe.
However, since I wanted these to be dense and fudgy, I use very little arrowroot starch and no leavening agents at all.
Everything can be mixed together in one big bowl which makes for a quick and no fuss clean up. I love that. Now, I can get to trying my first bite way quicker! 🙂
They are the perfect dessert to have on hand for your family throughout the week or for a big group of guests. I like to cut them into 16 squares, but cut them as big or as small as you'd like.

How to make gluten free and dairy free brownies
Preheat the oven to 350°F (177°C). Brush the bottom and sides of an 8x8" baking pan with oil and line with parchment paper. Set aside.
Using the double boiler method or in a microwaveable bowl, melt together the dark chocolate chunks and coconut oil. Be sure to stir occasionally to ensure the chocolate doesn't burn at the bottom. If using a microwave, only heat up 30 seconds at a time. Once it has melted, give it a nice stir and set aside to cool.
In a separate large mixing bowl, add eggs, milk, coconut sugar, cacao, arrowroot, salt, vanilla, and vanilla extract. Mix well with a fork or use a hand mixer to blend everything together until smooth throughout, about 30 seconds. Do not over mix.
Once the chocolate/oil mixture is warm to the touch (but not hot), add it to the large mixing bowl. Fold several times using a spatula until smooth throughout. This will take about 1 minute.
Pour the batter into the prepared baking dish and smooth over with an offset spatula. Tap on the counter a few times to release air bubbles. Bake at 350°F for 24-28 minutes. Remove from the oven and let cool in the pan for about 15-20 minutes before carefully removing from the pan.
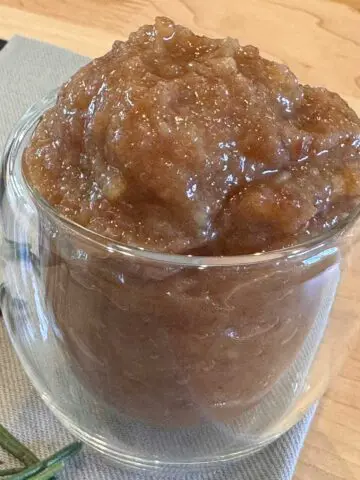
Once they are cool to the touch, use an offset spatula to spread on the chocolate topping. Let the brownies set in the refrigerator for about 1 hour before carefully slicing. Top off with your favorite flaked sea salt and serve.


Expert Tips & Tricks
- Create a successful transfer by securing your parchment paper in the pan correctly: Measure out the parchment paper to the width of the longest side of the pan (in this case, it's even). Make sure it's long enough to line the entire bottom of the pan, both sides and have a few inches of overhang on either side.
- Use between a 72-85% dark chocolate. Otherwise, they may turn out a bit too sweet with the addition of the coconut sugar.
- Do your best not to over-mix the batter. As soon as the dry ingredients seem well incorporated, halt the mixing. Sometimes, over-mixing can lead to a dryer finished product.
- Pull the brownies out just as soon as you think they are done. It's better for them to be a bit under-baked and continue cooking in the pan while they set.
- Get yourself a high quality flakey sea salt. Maldon is my absolute favorite! I use it to top off a lot of my chocolate baked goods, i.e. chocolate chip blondies and paleo chocolate chip cookies, too!
- Let the brownies sit in the pan and cool slightly (about 30 minutes) before carefully lifting up and removing the parchment paper.
Substitutions & Questions
Feel free to use your favorite fat of choice. If you don't want to use coconut oil, you can use melted butter or ghee.
Instead of coconut sugar, you can use brown sugar. However, refined sugar is considerably sweeter, so I do not recommend that.

More paleo chocolate recipes you'll love:
Flourless Chocolate Tahini Brownies
5 Minute Chocolate Chip Blondies
Gluten Free Chocolate Cupcakes
Gluten Free Raspberry Brownies

Dairy Free Brownies
Ingredients
Brownies
- 6 ounces dark chocolate weighed out & chopped into chunks, see notes
- ½ cup coconut oil
- 2 large eggs
- 1 egg yolk
- 2 tablespoons non-dairy milk
- ¾ cup coconut sugar
- ¼ cup cacao powder
- ½ cup arrowroot flour
- ½ teaspoon kosher salt
- 2 teaspoons pure vanilla extract
Chocolate Topping
- 4 ounces dark chocolate chunks or chips
- ⅓ cup coconut cream see notes
- flaked sea salt for topping
Instructions
- Preheat the oven to 350°F (177°C). Brush the bottom and sides of an 8x8" baking pan with oil and line with parchment paper. Set aside.
- Using the double boiler method or in a microwaveable bowl, melt together the dark chocolate chunks and coconut oil. Be sure to stir occasionally to ensure the chocolate doesn't burn at the bottom. If using a microwave, only heat up 30 seconds at a time. Once it has melted, give it a nice stir and set aside to cool.
- In a separate large mixing bowl, add eggs, milk, coconut sugar, cacao, arrowroot, salt, vanilla, and vanilla extract. Mix well with a fork or use a hand mixer to blend everything together until smooth throughout, about 30 seconds. Do not over mix.
- Once the chocolate/oil mixture is warm to the touch (but not hot), add it to the large mixing bowl. Fold several times using a spatula until smooth throughout. This will take about 1 minute.
- Pour the batter into the prepared baking dish and smooth over with an offset spatula. Tap on the counter a few times to release air bubbles. Bake at 350°F for 24-28 minutes. If you are unsure if the brownies are done, it's better to pull out on the earlier end because they will continue to cook in the pan for a few minutes after coming out. Remove from the oven and let cool in the pan for about 15-20 minutes before carefully removing from the pan.
- Once they are cool to the touch, use an offset spatula to spread on the chocolate topping. Let the brownies set in the refrigerator for about 1 hour before carefully slicing. Top off with your favorite flaked sea salt and serve.
Notes
- Make sure you weigh out your dark chocolate. It's important that you have exactly 6 ounces.
- Coconut cream is the cream that has separated to the top of a can of coconut milk that has been sitting in the refrigerator overnight. You can alternatively buy straight, canned coconut cream.
- Brownies will keep on the counter in an airtight container for up to 2 days. Alternatively, keep them in the refrigerator for up to 5 days.

Amber says
Can’t wait to try these, yum! But quick question— I see to add cacao in step 3, but don’t see an amount of cacao in ingredients list. Am I misreading? Thanks!
How embarrassing!!! Just added for you- thanks for telling me!
Amber says
No worries and thank you! Making them with my daughter now 😋
Woo hoo, that makes me so happy. Please update me after you have tried them!